
Product Page
Booster Kit for Local Inverter – Price in Hall Road Lahore
₨ 5,000
Need some help?
Contact Us
Product Ships in
2-3-business Days
Payment Methods:
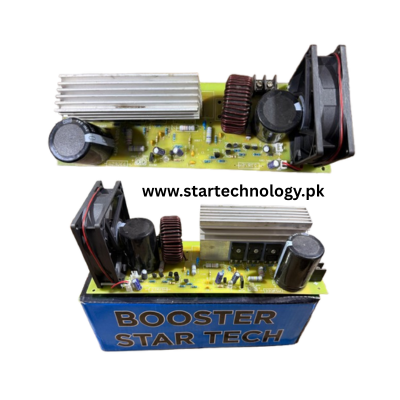
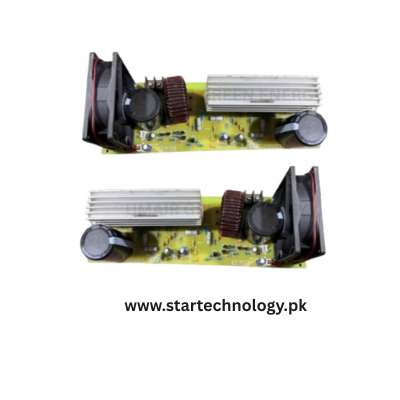
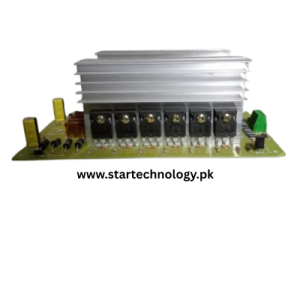
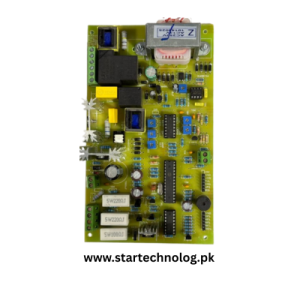
Booster Kit for Local Inverter in Pakistan
Key Furfures Booster Kit:
- Booster kit for local 5kw inverter
- Voltage range 80vdc to 380v DC
- Output voltage 350vdc
- 7kw inverter with booster kit
- Booster kit available for local inverter
- 4 solar inverter booster lode testing..3
- 4 solar to 5 solar supported 5 80
- Booster for local inverter Input 80vdc to 380vdc Output 350vdc
- 3kva inverter with booster 3solor 580w
- STORAGE TANK, INTELLIGENT INVERTER BOOSTER PUMP
- Booster Kit for Local Inverter in Pakistan
- Booster Kit for 7kw Inverter
- Booster Kit for 5kw Inverter
- Booster Kit for 10kw Inverter
-
Solar inverter with booster circuit
-
Booster kit for local 5kwatt solar inverter
-
Input 80vdc to 380vdc
-
Output 350vdc
-
Booster circuit for solar inverter
-
2 plates solar inverter with booster
-
Ic and pcb also available
how to use local inverter booster with inverter?
Using a DC-DC booster (like your 80V to 350V unit) with an inverter is typically done in solar power systems to optimize power transfer from solar panels to the inverter. It's crucial to understand the connection points and safety procedures, as improper wiring can damage equipment and pose a serious safety hazard.
Disclaimer: Electrical work can be dangerous. If you are not a qualified electrician or don't have experience with solar power systems, it is highly recommended to consult or hire a professional to perform the installation. This guide provides general information and should not be considered a substitute for professional advice or the booster/inverter's specific user manuals.
Understanding the Components:
- Solar Panels (PV Array): These produce DC electricity, but their voltage varies with sunlight and temperature. In your case, you'd likely have a string of panels producing around 80V (or within a range that includes 80V).
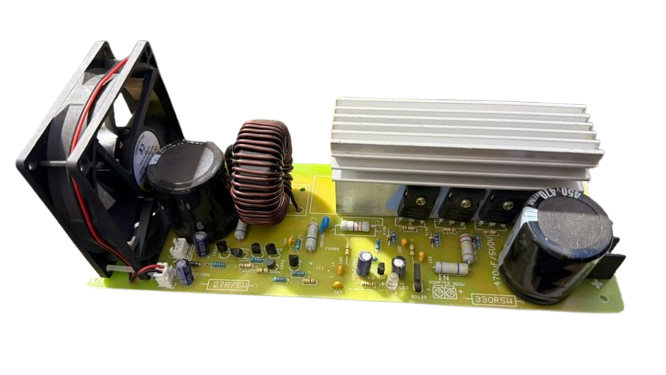
- DC-DC Booster (80V to 350V): This device takes the variable low DC voltage from your solar panels and boosts it to a stable, higher DC voltage (around 350V) required by the inverter. Crucially, if it has MPPT (Maximum Power Point Tracking) built-in, it optimizes the power extraction from your panels.
- Inverter: This converts the DC electricity from the booster (or directly from solar panels/batteries in other configurations) into AC electricity that your home appliances can use or that can be fed into the grid. Many inverters have a specific DC input voltage window (e.g., 200V-500V DC).
- DC Disconnects/Breakers: Safety switches used to isolate DC components.
- AC Disconnects/Breakers: Safety switches used to isolate AC components.
- Grounding: Essential for safety and system protection.
General Wiring Diagram (Conceptual):
Here's a conceptual flow of how you'd typically connect them. Always refer to the specific wiring diagrams provided in the manuals for your booster and inverter.
-
Solar Panels (PV Array) DC-DC Booster Input:
- Connect the positive (+) and negative (-) terminals of your solar panel string (or strings connected in parallel/series to achieve the required 80V input for the booster) to the designated "PV Input" or "DC Input" terminals on your DC-DC booster.
- Crucial: Ensure correct polarity. Reversing polarity can severely damage the booster and/or panels.
- Use appropriate gauge DC cables rated for outdoor use and the expected current.
-
DC-DC Booster Output Inverter DC Input (DC Link):
- Connect the positive (+) and negative (-) "DC Output" terminals of your DC-DC booster to the "DC Input" or "PV Input" terminals of your inverter.
- This is the "DC Link" – the intermediate DC voltage bus between the booster and the inverter. The booster's job is to maintain this DC link at the inverter's optimal input voltage (e.g., 350V).
- Crucial: Again, ensure correct polarity.
- Use appropriate gauge DC cables.
-
Inverter AC Output Main Electrical Panel/Load:
- Connect the AC output terminals of your inverter to your home's main electrical distribution board (DB) or directly to specific loads, depending on whether it's a grid-tied, off-grid, or hybrid system.
- This connection will typically involve Line (L), Neutral (N), and Earth (Ground) wires.
- Crucial: This requires careful consideration of local electrical codes in Lahore, proper circuit breaker sizing, and potential net metering agreements if you're feeding power back to the grid.
-
Grounding:
- Ensure both the DC-DC booster and the inverter are properly grounded to an earth rod according to local electrical standards. This is critical for safety and protection against electrical faults.
Step-by-Step Connection (General Procedure - ALWAYS consult manuals):
-
Safety First!
- Turn off all power: Before touching any wiring, ensure all AC breakers (main, inverter, load) and DC disconnects (solar array, battery if applicable) are in the "OFF" position.
- Verify no voltage: Use a multimeter to confirm that there is no voltage present on any wires you are about to connect.
- Wear appropriate PPE: Insulated gloves, safety glasses.
-
Mounting:
- Mount the DC-DC booster and the inverter in a well-ventilated area, protected from direct sunlight, rain, and excessive dust, as per their respective manuals. Ensure proper clearances for cooling.
-
Solar Panel Connections to Booster (Input):
- Strip the ends of the solar panel cables according to the booster's instructions.
- Carefully connect the positive and negative PV cables to the designated input terminals on the booster. Tighten securely.
-
Booster Output to Inverter (Input):
- Strip the ends of the cables that will connect the booster's output to the inverter's input.
- Connect the booster's positive output to the inverter's positive DC input, and the booster's negative output to the inverter's negative DC input. Tighten securely.
-
Inverter AC Output to Load/Grid (if applicable):
- Connect the inverter's AC output terminals to your main electrical panel or designated load circuits. This often involves connecting to a dedicated breaker in your distribution board.
-
Grounding Connections:
- Connect the grounding terminals of both the booster and the inverter to your system's earth ground.
-
Final Checks (Before Powering Up):
- Double-check all wiring: Ensure all connections are secure and correct (polarity, phase, neutral, ground).
- Verify wire sizes: Confirm that all cables are of the correct gauge for the expected current.
- Check torque: Ensure all terminal screws are tightened to the manufacturer's specified torque.
- Clearance: Make sure there's nothing obstructing ventilation on any of the devices.
-
Power Up Sequence:
- Typically, the sequence is:
- Turn on the DC disconnect/breaker for the solar panels to the booster.
- Turn on the DC disconnect/breaker for the booster's output to the inverter.
- Turn on the inverter's internal DC switch (if it has one).
- Wait for the inverter to perform its self-tests and initialize.
- Turn on the AC breaker for the inverter's output at your main electrical panel.
- Monitor the inverter display for any error codes or indications.
- Typically, the sequence is:
Important Notes for Lahore (and generally):
- Local Regulations: Always abide by the electrical codes and regulations set by NEPRA (National Electric Power Regulatory Authority) and your local DISCO (Distribution Company) like LESCO in Lahore. For grid-tied systems, you will need approval and a net metering agreement.
- Professional Installation: Given the high voltages involved (350V DC and AC mains), professional installation by a certified solar technician or electrician is highly recommended to ensure safety, efficiency, and compliance.
- Documentation: Keep all manuals for your solar panels, booster, and inverter in a safe place. They contain vital information for installation, troubleshooting, and maintenance.


Reviews
There are no reviews yet.